![[Digging Out Seedlings]](http://www.richters.com/OnlineSeminars/seeding/pricking.jpg)

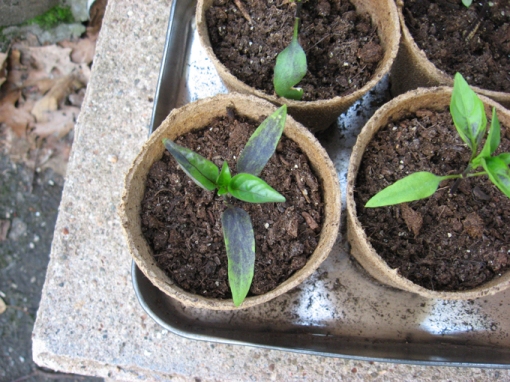
One of the most common mistakes made is leaving the seedlings in the seed flat too long. The ideal time to transplant young seedlings to individual pots is when they are small and there is little danger from setback. This is usually about the time the first true leaves appear above or between the cotyledon leaves (the cotyledons or seed leaves are the first leaves the seedling produces). Don’t let plants get hard and stunted or tall and leggy. To transplant, carefully dig up the small plants with a knife or wooden plant label. Let the group of seedlings fall apart and pick out individual plants. Gently ease them apart in small groups which will make it easier to separate individual plants. Avoid tearing roots in the process. Handle small seedlings by their leaves, not their delicate stems. Punch a hole in the medium into which the seedling will be planted. Make it deep enough so the seedling can be put at the same depth it was growing in the seed flat. Small plants or slow growers should be placed 1 inch apart and rapid-growing, large seedlings about 2 inches apart. After planting, firm the soil and water gently. Keep newly transplanted seedlings in the shade for a few days, or place them under fluorescent lights. Keep them away from direct heat sources. Continue watering and fertilizing as in the seed flats. Most plants transplant well and can be started indoors, but a few plants are difficult to transplant. These are generally directly seeded outdoors or sown directly into individual containers indoors. Examples include zinnias and cucurbits, such as melons and squash.
There are many types of containers available commercially. Those made out of pressed peat can be purchased in varying sizes. Individual pots or strips of connected pots fit closely together, are inexpensive, and can be planted directly in the garden. When setting out plants grown in peat pots, be sure to cover the pot completely. If the top edge of the peat pot extends above the soil level, it may act as a wick, and draw water away from the soil in the pot. To avoid this, tear off the top lip of the pot and then plant flush with the soil level.
Hardening Plants
Hardening is the process of altering the quality of plant growth to withstand the change in environmental conditions which occurs when plants are transferred from a greenhouse or home to the garden. A severe check in growth may occur if plants produced in the home are planted outdoors without a transition period. Hardening is most critical with early crops, when adverse climatic conditions can be expected. Hardening can be accomplished by gradually lowering temperatures and relative humidity and reducing water. This procedure results in an accumulation of carbohydrates and a thickening of cell walls. A change from a soft, succulent type of growth to a firmer, harder type is desired.
This process should be started at least 2 weeks before planting in the garden. If possible, plants should be moved to a 45o to 50oF temperature indoors or outdoors in a shady location. A cold frame is excellent for this purpose. When put outdoors, plants should be shaded, then gradually moved into sunlight. Each day, gradually increase the length of exposure. Don’t put tender seedlings outdoors on windy days or when temperatures are below 45oF. Reduce the frequency of watering to slow growth, but don’t allow plants to wilt. Even cold-hardy plants will be hurt if exposed to freezing temperatures before they are hardened. After proper hardening, however, they can be planted outdoors and light frosts will not damage them. The hardening process is intended to slow plant growth. If carried to the extreme of actually stopping plant growth, significant damage can be done to certain crops. For example, cauliflower will make thumb size heads and fail to develop further if hardened too severely. Cucumbers and melons will stop growth if hardened.
No comments:
Post a Comment