Wednesday, March 31, 2010

Garden Easter Baskets!

Window ledge basket!


Sedum metal basket hanging on the gate!

Herb wagon on the deck!


http://img4.southernliving.com/i/2003/03/plant-easter-basket/garden-easter-basket-m.jpg
From Southern Living....Plant an Easter Basket! I don't often use material that is borrowed, but this was too wonderful to resists. Thank you Southern Living and Charlie Thigpen.

Hop into gardening by nestling small, plant-filled containers in strategic locations throughout the landscape. To create a fun seasonal look, we gave this display an Easter theme, mixing foliage, flowers, eggs, and a small rabbit statuary.

Classic Wicker
We lined our traditional Easter baskets with burlap and filled them with soil. Then we placed plants inside. To make the wicker last longer, you can leave plants in their plastic pots and arrange them in the basket. Fill in the voids between containers with moss or burlap. Take the pots out when watering, so the baskets won't stay wet.

Durable Metal
A metal basket makes an excellent, long-lasting planter. This one needed drainage holes, so we drilled a few in the bottom before planting golden club moss and hostas. Golden club moss grows flat and covers the soil like a shimmering chartreuse blanket underneath the leafy hostas. This shade-loving mix provides a medley of foliage from spring till summer.

New Life for an Old Basket
A rusted, wire-framed hanging basket makes a great planter. We removed the chains and let it rest on the ground. Then we added a coco-fiber liner and filled it with potting soil. When choosing plants, be creative and try a shrub. We put a small boxwood in the center and tucked petunias around it. Once the boxwood outgrows the space, plant it in the yard. We used variegated ivy along the outside edge of the container.

Tasty Treats
Two of the baskets contain edible greenery. One is filled with creeping thyme and topped with a large ornamental egg. The thyme's fine texture makes a nice green nest for the oversize egg. The larger basket contains chartreuse leaf lettuce mixed with chives, which have spiky, hollow foliage. Chives produce beautiful pink spring blooms. For a decorative touch, eggshells can act as pots. Crack open real eggs, wash the shells, and fill them with small sprigs of thyme.

This season, let baskets decorate your landscape. It's a great time of year to garden, and plants are plentiful. So what are you waiting for? Plant one for yourself, and give one to a friend for a memorable spring treat.

Monday, March 29, 2010

Rita Babcock...gardener of the week!

Posted by Picasa

Bloom Where You're Planted!

Since this is my Mom's favorite saying, I was happy to see this sign hanging in our friends garden! Her garden is full of raised beds, potting benches and tools in a big mailbox. And, she takes the time to explain how little chickens grow up to be big white chickens to little interested girls. Thanks Rita Babcock for your gardening inspiration!
Posted by Picasa

Best organic fertilizers....and info about poop!

At some point in your gardening experience, you may want to use a fertilizer to give your plants an extra boost. Unfortunately, many gardeners rely on chemical fertilizers to grow their trees, grass, flowers, fruits, and vegetables. However, there is an increasing awareness that many of the chemicals we use in our yards can over the long run negatively affect the environment and the health of our loved ones, neighbors, and pets.

Thankfully, there are a number of healthy natural and organic fertilizers available that will help you grow a lush, green garden and lawn without the use of potentially harmful chemical fertilizers.

THE BASICS OF ORGANIC FERTILIZERS:

Like traditional fertilizers, organic fertilizers show their content with three bold numbers. These numbers represent three different compounds: Nitrogen, Phosphorous, and Potash, which we can also describe with the letters N-P-K. The three numbers listed on fertilizer labels correspond to the percentage of these materials found in the fertilizer.

In addition to other properties, Nitrogen helps plant foliage to grow strong. Phosphorous helps roots and flowers grow and develop. Potassium (Potash) is important for overall plant health.

What Are Organic Fertilizers?

Some gardeners don't believe the claims of fertilizers to be really organic.

Yet chemical fertilizers are made in factories by turning nitrogen gas into ammonia and treating rock phosphate with acid. The problems with chemical fertilizers have been:
  • rapid release of nutrients and possible unbalanced growth,
  • a salty environment which damages plants and soil,
  • gross waste and pollution.

  • BEFORE YOU APPLY ORGANIC FERTILIZERS:

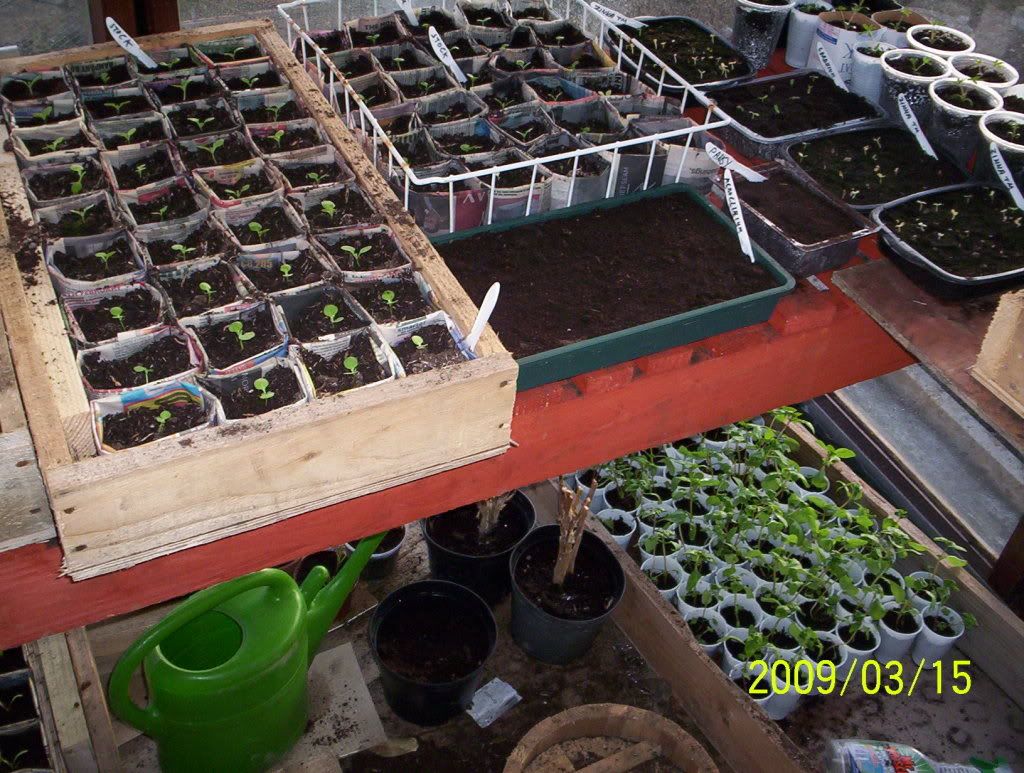
    One of the best ways to improve the health of your plants is by adding organic compost to your soil. Compost can help reduce the amount of fertilizer treatments your plants need. If you’re not composting organic garden waste and kitchen scraps now, you should start as soon as you can. The addition of compost to your garden soil will add nutrients, improve drainage, and help your plants’ immune systems.


    MANURE

    Manures and composted plant materials add organic matter, which helps soil retain moisture and structure which prevents compaction, and helps prevent nutrients from leaching away. They also balance extremes in soil pH.

    Good poop, bad poop

    What is good for the goose, is not always good for the gander. There are a few manures that should not be used, primarily those of meat eaters. According to Cornell University "Homeowners should not use any manure from dogs, cats, or other meat-eating animals, since there is risk of parasites or disease organisms that can be transmitted to humans."

    The most common sources of manure are horses, cattle, goats, sheep, rabbits and poultry. Below is a guide showing how manures measure up, nutrient-wise. While all animal manures are good sources of organic matter and nutrients, it's impossible to make a precise analysis, mostly because bedding materials vary so much. For example, manure with straw or sawdust will have a different nitrogen composition than pure manure. But it's useful to know whether the manure you're using is rich or poor in a particular nutrient such as nitrogen.

    Just like we need to eat to maintain our health, soil needs continual replenishment of its organic matter to decompose into humus. Humus helps create a rich, moisture-retaining soil and makes nutrients available to plants.

    How common manures measure up

    Manure Chicken Diary cow Horse Steer Rabbit Sheep
    N-P-K 1.1 .80 .50 .25 .15 .25 .70 .30 .60 .70 .30 .40 2.4 1.4 .60 .70.30 .90
    Sources: Rodale's All-New Encyclopedia of Organic Gardening, An Illustrated Guide to
    Organic Gardening
    , by Sunset Publishing, and the Rodale Guide to Composting.

    Chicken manure
    Poultry manure (chicken in particular) is the richest animal manure in N-P-K. Chicken manure is considered "hot" and must be composted before adding it to the garden. Otherwise, it will burn any plants it comes in contact with.

    Dairy (cow) manure
    Dairy Manure may be the single most useful soil-builder around," says Ann Lovejoy, lifetime organic gardener and writer in Seattle, Washington. "Washed dairy manure from healthy cows is just about perfect for garden use; it can be used as a topdressing and for soil improvement," she adds. Dairy manure is preferable to steer manure, which has a higher salt and weed seed content. Though cow manure has low nutrient numbers, that's what makes it safe to use in unlimited quantities.

    Horse manure
    Horse manure is about half as rich as chicken manure, but richer in nitrogen than cow manure. And, like chicken droppings, it's considered "hot". Horse manure often contains a lot of weed seeds, which means it's a good idea to compost it using a hot composting method.

    Steer manure
    Steer manure is one of the old standbys, but it's not the most beloved because it often contains unwanted salts and weed seeds.

    cow manure organic fertilizer


    Rabbit manure
    Rabbit manure is even higher in nitrogen than some poultry manures and it also contains a large amount of phosphorus--important for flower and fruit formation.

    Sheep manure
    Sheep manure is another "hot" manure. It is somewhat dry and very rich. Manure from sheep fed hay and grain will be more potent than manure from animals that live on pasture.

    How to use manure

    No matter what kind of manure you use, use it as a soil amendment, not a mulch. In other words, don't put raw manure directly on garden soils. Raw manure generally releases nitrogen compounds and ammonia which can burn plant roots, young plants and interfere with seed germination. In fact, it's recommended that all animal manure should be aged for at least 6 months. Many gardeners spread fresh manure in the fall and turn it in to the top 6 inches of soil a month before spring planting.

    A better treatment is to hot-compost manure before applying it to the garden. Hot composting, where the pile reaches at least 150 degrees F) helps to reduce the probability of passing dangerous pathogens on to people who handle the manure or eat food grown with manure compost.

    While the chance of contamination is slim, severe sickness and even death may occur if contaminated produce is eaten. To be safe, either compost your manure or apply it in the fall after harvest. Wash up after handling manure and don't forget to rinse the vegetables and fruit well before you eat them--always a good idea whether your use manure or not.


    Friday, March 26, 2010

    More early sping plantings for your garden!

    http://z.about.com/d/gardening/1/0/T/K/RHubarb.jpg

    Rhubarb begins to peek up out of the ground very early on and grows quickly in the cool spring weather. My Mom used to make a killer rhubarb cake every spring. Rhubarb sauce with a little cinnamon and cream on top is delicious. And, there is nothing better than rhubarb strawberry pie.

    • Planting: Usually grown from purchased crowns (rhizomes and buds). You can divide existing rhubarb plants (root balls) or even start them from seed, although they might not grow true to color. When growing from seed, it can take 2 years before the plants are large enough to harvest. Any well drained, rich soil. Prefers a slightly alkaline soil - pH of 6.0 to 6.8. Since you’re growing it for the foliage and it has a sort season, you want a soil high in organic matter, to support quick spring growth. Care should be taken when preparing the rhubarb bed, since the plants will be there for quite awhile after.

      Space rhubarb crowns every 3 - 4 feet in rows about 3 feet apart. If planted too closely, the plants will grow smaller and less productive. You can plant in a long trench, much like asparagus, or dig individual holes. Place the crown 2 inches below the surface of the soil. Firm the soil gently and water well.

      Rhubarb likes regular water, although mature plants are quite drought resistant.

      Remove flower stalks as soon as they appear. Flower stalks are rounder, thicker and taller than leaf stalks. If allowed to mature and flower, the leaf stalks will be thinner.

      Rhubarb does not like competition from weeds. A 2-3 inch layer of mulch will suppress weeds as well as help conserve water.

    • Harvesting: As with most perennial crops, don’t harvest the first year. Allow the plant to hold onto its leaves and build its strength. A top dressing of manure will keep it going.

      You can take a small harvest the second year. Harvest stalks that are at least 1" thick and leave the rest. During the 3rd year, you can harvest for about 1 month. After the 3rd year, you can harvest whenever there are stalks ready for picking. Plants can remain productive for 8 to 15 years, unless affected by pests or diseases.

      To harvest, cut the stalks at the soil line or pull out individual stalks as needed. You can harvest the whole crop at the same time or harvest in succession over a 4-6 week period. Although the leaves are toxic, they can be used in the compost pile....the oxalic acid will dissipate in the composting process.

      As the temperature warms, growth slows and may even go dormant, but will resume in fall as temperatures fall.

    • Dividing Rhubarb: To divide rhubarb, dig the root mass and divide the crown between buds or eyes, into pieces about 2" long, with roots attached. You can divide in spring or fall, but it’s easier in spring, when the plant is coming out of dormancy and growing new roots.
    • Winter Protection: Rhubarb enjoys needs a period of cold to remain productive. A layer of mulch over the bed, once the ground freezes, will protect the roots from drying out. Otherwise, the plants should be fine on their own.
    • Maintenance: Plants will need to be divided or trimmed every 4-5 years. You will notice the stalks getting thinner as the crown becomes overgrown and crowded. When this happens, either divide or Trim the crown to 4-5 buds.

    Thursday, March 25, 2010

    Lettuce the perfect cool spring weather crop!

    Growing lettuce

    Lettuce may take a little protection to get it going in the early spring, but, oh, it never tastes better than when it’s grown in the crisp spring air. Cool, wet springs are perfect lettuce growing weather. It won’t bolt and you’ll probably have time for 2-3 succession plantings.

    Starting Lettuce

    • Lettuce is a cool season crop and consequently is best grown in either spring or fall.
    • However, lettuce likes a temperature around 70o to germinate, so early plantings should be started as plugs.
    • Lettuce seeds need light to germinate. Just barely cover the seed with soil.
    • After a couple of weeks check to see if the roots have branched out to the sides of the plug. If so, they are hardy enough to go in the ground.
    • Don’t let the seedlings get too large before placing them out.
    Care & Feeding of Green Crops
    • If you have fertile soil, you shouldn’t need to feed lettuce plants, unless you plant the “cut and come again” varieties all summer. This is one crop where extra nitrogen can’t hurt, since all you want from the plant is leaf.
    • Well-rotted manure or compost is ideal.
    • The plants will need regular watering, as lettuce tends to have a shallow root system.
    • Don’t keep the area damp or use mulch or you will be inviting slugs.
    • A lettuce crop is ideal for the intensive gardening method which is getting a lot of attention lately, because it matures rapidly, can be planted quite closely and can be planted in succession if you choose seasonal varieties.
    • Lettuce can even be grown in containers or used as a decorative border.
    • If your lettuce looks like it’s about to bolt, pull it out of the ground, roots and all, and replant. This shock to its system will slow its growth. Keep well watered.

    Harvesting

    As soon as the heart has formed the lettuce plant is ready for cutting. Check for firmness by gently pressing down on the top of the heart area with the back of your hand. This is the safest way as squeezing may damage plant tissue and if the Lettuce variety: Little Gem plant is not ready to pick some horrible diseases may enter, as discussed above.
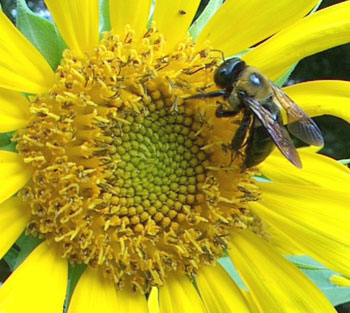
    If the plant is ready and left in the ground too long (5-7 days) the heart will start to grow upwards - a sure sign it is beginning to bolt. Cut them immediately for use or dig up and compost.

    When cutting for use it is best to lift the whole plant, cut off the root and lower leaves, placing them on your compost heap - don`t leave on the bed to attract pests and diseases.

    You should now be holding a delicious looking lettuce plant of some variety. This is the end game - after applying your knowledge of how to grow lettuce you can now go and enjoy with pride the very real fruits of your labor, there are not many thrills greater than this.

    Wednesday, March 24, 2010

    Asparagus...an early spring cool weather crop!

    Photo of Asparagus

    http://tryonfarm.org/share/files/images/Asparagus%20Asparagus%20officinalis.jpg

    There aren't many perennial vegetable crops, vegetables you can plant once and harvest for many years to come. Looking forward to the first tender, pencil sized spears of asparagus poking through in the garden is a rite of spring. If you thought you didn’t like asparagus, you haven’t tried it freshly picked. Asparagus is one of the few perennial vegetable crops. The shoots are picked as young spears in the spring. Later in the season the foliage matures into an airy, fern-like cloud which changes to a golden color in the fall. Because asparagus takes up a permanent place in the garden, but can be an attractive plant, many people with space imitations use asparagus as a border or hedge plant.

    You can grow asparagus either from seeds or from crowns. Asparagus crowns are really just the base and roots of a one-year old plants. Most people find it easier to grow from crowns, which are readily available in the spring. Unlike many plants, the roots on asparagus crowns can withstand some air exposure and you will usually find them for sale loose. They should still look firm and fresh, not withered or mushy.


    When and How to Plant Aspargus

    In warmer climates crowns can be planted in the fall. Early spring is the preferred time for cooler climates, about 4 weeks before the last expected frost date. Crowns can handle some frost because they are below ground. Asparagus is usually planted in rows, since you are going to dig trenches to plant them in. Start with a tench that is about a foot deep and 1 ½ feet wide. Working some compost into the bottom of the trench will get your plans off to a good start. Then make small mounds, about 6 inches high, along the bottom of the trench about every 18 inches. Spread the roots of each crown over the mounds and fill in the trench until the crowns are covered with 2-3 inches of soil. As the plants begin to grow, you can gradually fill in the remainder of the trench.


    Tuesday, March 23, 2010

    Caring for Tender Seedlings!

    http://tinyfarmblog.com/wp-content/uploads/2008/03/spr08_celeriac_seedlings.jpg


    Seedling Care and Nurturing:

    As your seedling emerges from the soil, most growers breath a big sigh of relief. Close your eyes and you can almost see the plant grow and flourish into it's full beauty, producing an enviable profusion of flowers or vegetables. As you open your eyes, you will immediately begin a new set of worries, over-nurturing the newborn indoors for a short time while the outdoor weather catches up with your dreams.

    Thin Seedlings as needed- - Plants in your garden do not like to be crowded. Ditto with your seedlings, who need all the sun and nutrients that they can get.You may want to leave a few extras for a while as mortality rate of seedlings can be high.

    Let there be light, and plenty of it- - As soon as the newborn seedling begins to emerge, it seeks light. Your newborn needs as much and as direct a light source as possible. Placing it by a window with a southern exposure is the first step. But this alone may not prove to be enough for the seedling to grow healthy and strong. First, the sun is not up as long in the spring as it is in the summer. Second, there are many rainy spring days with little or no direct sun. You should also acquire an artificial Grow Light and place the seedlings under it on cloudy days and at night.

    Let There be Water, in just the right amount- - Provide water to your seedling every couple of days. Do not soak the soil each night. Overly wet soil encourages the development of damping off disease. Let the soil dry out a little on the top, then water thoroughly. Watering from the bottom is preferred. If you have a seed tray, add water to the bottom of the tray . The soil will absorb it through the bottom holes in your container...your container does have holes in the bottom, doesn't it!?!

    Feed me, feed me- - The seedling does not need a lot of extra nutrients in it's first few days of life. Your soil starting mix usually comes with a balanced formula of nutrients that the seedlings need. After several days, adding a little liquid fertilizer to the water is helpful, but you do not need to give it full strength.

    If the roots begin to come out the bottom of the pot, it is time to plant your seedling outdoors, weather permitting. If it is still too cool, keep the bottom of the tray moist, or put some extra soil in the bottom of the tray. Or, transplant seedlings to a larger pot. Most plants do not like to be root bound.

    Guard against Leggy Plants- - Seedlings are leggy when their main stem or stalk grows tall and thin and can hardly support the leaf structure. It is caused by insufficient sunlight and a sheltered environment. Indoors, they do not experience the effect of wind, and do not need to develop structure to defend against it. Most seedlings do not even experience a slight breeze. When transplanted outdoors, "leggy" plants can be damaged or broken by the wind.

    Tip: Take your hand,or a couple sheets of newspaper and fan the plants a few times a day. You can even lightly brush the tops of the plants, brushing back and forth in varying directions. You may notice the plants seem to slow down for a period. What they are really doing is building a stronger stem or stalk.


    Let there be no Damping Off Disease:

    Those of us who have grown seedling indoors for any number of years know what "Damping Off" disease. This is a white mold that forms in the top of the soil. Damping Off disease flourishes in cold, wet damp weather along with little sunshine. It quickly spreads across the soil and wilts the seedling. Take it's habitat away, and the disease can not survive. Plants on the other hand, love just the opposite conditions. The more you make conditions ideal for your plants, the more likely you will avoid Damping Off Disease and other mold and fungal problems.

    If you do experience problems, do not give up hope. Here are some things you can do to minimize or eliminate disease problems:

    • First, get the plant in direct sunlight if at all possible.

    • Stop watering until the surface is very dry.

    • Water only from the bottom.

    • Scrape as much of the mold off the soil as possible.

    • Stir the top of the soil without disturbing the roots. It will also speed drying.

    • Add some soil, although this may or may not produce results.

    • Increase room air circulation. You can gently blow air on your plant trays with a small fan.

    Sunday, March 21, 2010

    The total delight of gardening!


    Even the wee ones love to be kissed by lady bugs! This is Gracie, my great niece in a photo taken by her Mom Mystie Blankenship who is about to move into a brand new home and build a brand new garden.

    Saturday, March 20, 2010

    Fragrant Garden!

    Flower fragrance is food for the soul
    As much as aroma is food for the nose, it is also food for the soul. Nothing is as sure to bring a smile to any face as a whiff of the first bloom on a fragrant viburnum or daphne in spring. It is the confirmation of the promise of spring, a sure link to the goodness of the earth, and a vacation, if ever so fleeting, for the senses. There is a luxury in the perfumes of the garden, a luxury that remains enticingly in reach of almost everyone. You will thank yourself nearly 23,000 times a day.


    LavendersLavender Flowers

    Dianthus http://www.ces.ncsu.edu/wayne/agriculture/hort/graphics/Perennials/Dianthus.jpg

    Roses

    http://www.mooseyscountrygarden.com/rose-garden/pink-garden-roses.jpg

    http://www.nycgovparks.org/sub_things_to_do/highlights/blooming_calendar/bloom_gallery/images/korean_spice_viburnum_aurora.jpg

    Korean Spice Virbirnum

    Lilacs http://whatdoiknow.typepad.com/photos/flowers/lilacs.jpg In our everyday life, the average human draws 23,000 breaths a day. Included in every breath are the scents of our immediate surroundings, relaying a myriad of information. It is in this spirit that we plant our gardens with fragrant plants. The well planned fragrance garden provides a palette of scent....a "buffet" for the nose. In that same spirit, we should not lean solely on the flowers for the fragrance in our garden. The pungence of artemesia or the tang of lemon thyme can be perfect counterpoints for the spicy odor of flowers. Boxwood can not only define the border of the garden; it can be the canvas for a complex painting of aromas. Finally, the garden should not lack fragrance at any time of year. Even our garden chores can provide us with memory provoking scents. In the fall, the scent of burning leaves accompanies our annual clean up, and the smell of apples and pumpkins remind us of Thanksgivings past. In the winter, the smell of cut evergreens defines the Christmas holiday as surely as snow or Santa, and as the season progresses, forced paperwhites or hyacinths can herald the approach of spring.


    Friday, March 19, 2010

    Dividing and Transplanting!


    Thanks to Marie Ionotti from About.com for photos and script below!

    Dividing & Transplanting

    Spring is the ideal time for dividing or transplanting. Try to do this as soon as possible after the plant emerges. It's amazing how quickly plants recover from this abuse if you catch them early, when the weather is still mild and they're raring to grow.

    Many perennial plants grow in an ever widening clump. After several seasons of growing, these perennial plants will begin to die out in the center and look more like a ring than a clump. To keep the plants vigorous and blooming, a technique known as 'Division' is performed. Dividing perennial plants gives you healthier, longer lived plants and the bonus of more plants.

    When to divide perennials depends on the type of plant and how quickly it's growing. You don't have to wait until your perennial plants begin looking like doughnuts. In fact, it's better if you don't. Keep an eye out for clumps that have grown 2-3 times their size within 2-5 years. Any over grown clump or any clump that has simply exceeded the space allotted is a candidate for division.

    Preparing Perennial Plants For Division

    It's true that dividing perennials is good for them in the long run. However it is still a shock to their system and giving them a good soaking, preferably the day before you intend to divide, will help your success.Disturbing the root system of any plant interrupts its ability to feed and hydrate itself. Insuring that the roots are well saturated before disturbing them reduces the trauma. Along the same lines as watering your perennial plant well before digging and dividing it, having the new planting hole prepared before you dig will limit the plant's time out of the ground and the stress on the root system.

    A very common method of dividing perennials is to use 2 pitch forks to pry and split the plant apart. Perennial plants with fleshy roots, such as the daylily shown here, are easily pried apart with forks.Insert the forks into the center of the lifted plant so that the backs of the forks are touching each other and the tines are crossing. Press down so that the forks go through the plant. You will probably hear some cracking at this point. Let's hope it's your plant and not the handle on your pitch fork. In all seriousness, some plants are so dense that this method will not work. Exercise caution, since garden tool handles can break and send you tumbling.

    Dividing Perennials with Forks


    Thursday, March 18, 2010

    Butterflies in your garden!

    Perchance a butterfly would light on the end of your grandson's nose, you might want plantings that attract butterflies. This photo was taken by Mark Lisk....my son number one, of his number one son Wyatt.

    butterfly garden, butterfly gardening, garden for butterflies, attract butterfliesButterfly gardening has become one of the most popular hobbies today. What could bring more joy than a beautiful butterfly fluttering around your garden?! Butterflies need water, just like your plants do so keep a bird bath in the middle of your flower garden. Plant your butterfly garden in a sunny location (5-6 hours each day), but sheltered from the winds. Butterflies need the sun to warm themselves, but they won't want to feed in an area where they are constantly fighting the wind to stay on the plants. It is also a good idea to place a few flat stones in your sunny location so the butterflies can take a break while warming up.

    BUTTERFLY CATERPILLAR HOST PLANT BUTTERFLY NECTAR SOURCE
    American Painted Lady Everlasting, Daisy, Burdock Aster, Dogbane, Goldenrod, Mallow, Privet, Vetch
    American Snout Hackberry Aster, Dogbane, Dogwood, Goldenrod, Pepperbush
    Anise Swallowtail Queen Anne's Lace Buddleia, Joe Pye Weed
    Baltimore Checkerspot Turtlehead, False Foxglove, Plantain Milkweed, Viburnum, Wild Rose
    Black Swallowtail Parsley, Dill, Fennel Aster, Buddleia, Joe Pye Weed, Alfalfa
    Clouded Sulphur Clover Goldenrod, Grape Hyacinth, Marigold
    Cloudless Sulphur Cassia, Apple, Clover Zinnia, Butterfly Bush, Cosmos, Cushion Mum
    Comma Elm, Hops, Nettle Butterfly Bush, Dandelion
    Common Buckeye Snapdragon, Loosestrife Carpetweed
    Common Checkered Skipper Mallow/Hollyhock Shepherd's needles, Fleabane, Aster, Red Clover
    Common Sulphur Vetch Aster, Dogbane, Goldenrod
    Common Wood-nymph Purpletop Grass Purple Coneflower
    Eastern Pygmy Blue Glasswort Salt Bush
    Eastern Tailed Blue Clover, Peas Dogbane
    Falcate Orangetip Rock Cress, Mustard Mustard, Strawberry, Chickweed, Violet
    Giant Swallowtail Citrus Joe Pye Weed, Buddleia
    Gorgone Checkerspot Sunflower Sunflower, Goldenrod
    Gray Hairstreak Mallow/Hollyhock, Clover, Alfalfa Thistle, Ice Plant
    Great Spangled Fritillary Violet Thistle, Black-eyed Susan, Milkweed, Ironweed
    Greater Fritillary Violet Joe Pye Weed
    Gulf Fritillary Pentas, Passion-vine Joe Pye Weed
    Hackberry Emperor Hackberry Sap, Rotting fruit, Dung, Carrion
    Little Glassywing Purpletop Grass Dogbane, Zinnia
    Little Yellow Cassia, Clover Clover
    Monarch Milkweed Dogbane, Buddleia
    Mourning Cloak Willow, Elm, Poplar, Birch, Nettle, Wild Rose Butterfly Bush, Milkweed, Shasta Daisy, Dogbane
    Orange Sulphur Vetch. Alfalfa, Clover Alfalfa, Aster, Clover, Verbena
    Orange-barred Sulphur Cassia Many plants
    Painted Lady Thistle, Daisy, Mallow/Hollyhock, Burdock Aster, Zinnia
    Pearl Crescent Aster Dogbane
    Pipevine Swallowtail Dutchman's Pipe, Pipevine Buddleia
    Polydamus Swallowtail Pipevine Buddleia
    Queen Milkweed Milkweed, Beggar-tick, Daisy
    Question Mark Hackberry, Elm, Nettle, Basswood Aster, Milkweed, Sweet Pepperbush
    Red Admiral Nettle Stonecrop, Clover, Aster, Dandelion, Goldenrod, Mallow
    Red-spotted Purple Black Cherry, Willow, Poplar Privet, Poplar
    Silver-spotted Skipper Black Locust, Wisteria Dogbane, Privet, Clover, Thistle, Winter Cress
    Silvery Checkerspot Sunflower Cosmos, Blanket Flower, Marigold, Phlox, Zinnia
    Sleepy Orange Cassia, Clover Blue Porter, Beggar Tick, Aster
    Spicebush Swallowtail Spicebush, Sassafras Dogbane, Joe Pye Weed, Buddleia
    Spring Azure Dogwood, Viburnum, Blueberry, Spirea, Apple Blackberry, Cherry, Dogwood, Forget-me-not, Holly
    Tiger Swallowtail Black Cherry, Birch, Poplar, Willow Tree sap, Joe Pye Weed, Buddleia
    Variegated Fritillary Violet, Passion Vine Joe Pye Weed
    Viceroy Willow, Poplar, Fruit Trees Thistle, Beggar-tick, Goldenrod, Milkweed
    Western Tailed Blue Clover, Peas Legumes
    White Admiral Birch, Willow, Poplar, Honeysuckle Aphid Honeydew, Bramble Blossom
    Zabulon Skipper Purpletop Grass Blackberry, Vetch, Milkweed, Buttonbush,Thistle
    Zebra Longwing Passion-vine Verbena, Lantana, Shepard's Needle
    Zebra Swallowtail Pawpaw Dogbane, Joe Pye Weed, Buddleia, Privet, Blueberry


    Viceroy Butterfly

    Wednesday, March 17, 2010

    The Birds and the Bees! Another good reason for organic gardening!

    Pollinating is the busy work of bees and birds...love gone wild!
    http://www.sfsu.edu/~news/2008/spring/images/27.jpgBee Pollination

    Bees are the most productive pollinators because they intentionally collect pollen for their larva. Their legs have bristles that act as a pollen brush, with the first two pairs of legs brushing pollen from their hairy body and the third pair forming a pollen comb that collects pollen from bristles. The comb forces pollen into the pollen baskets on the legs. Bees have a sucking tongue (shorter than the butterflies and moths) that sips nectar, which the bees regurgitate into honey, which is food for the rest of the hive.

    http://www.ces.ncsu.edu/4hplantandsoils/images/Pollination%20photos/Humming_flowers.jpg
    Hummingbird contributions to the garden.

    Hummingbird pollinated flowers have a tendency to produce a certain amount of nectar that is drained by the birds. After the bird leaves to hunt for more nectar, the flowers will refill with more nectar, to encourage multiple opportunities to attract more birds and successful pollination.

    Tuesday, March 16, 2010

    Pest resistant plantings.

    http://naturescrusaders.files.wordpress.com/2009/01/ladybug.jpg
    Ladybugs are one of the good guys!


    How to Plant a Pest Resistant Garden!

    Pests bug me! Especially in my garden, so I have learned to pick plants that cut down on pest maintenance chores and the use of pesticides.

    1. There are many plants that will attract beneficial insects that prey on pests that damage your garden. Not all bugs are pests however. Ladybugs and praying mantis are good examples of beneficial bugs in the garden!

    2. Repels:
      Artemisia - produces a strong antiseptic aroma that repels most insects. Use in flower borders or in a vegetable garden.
      Basil - oils repel thrips, flies and mosquitoes.
      Borage - repels tomato hornworms and cabbage worms and attracts beneficial bees and wasps.
      Catnip - repels just about everything, except for cats! Keeps away flea beetles, aphids, Japanese beetles, squash bugs, ants, and weevils.
      Chives - repels Japanese beetles and carrot rust flies.
      Dahlias - repel nematodes.
      Garlic - planted near roses it repels aphids. It also deters codling moths, Japanese beetles, root maggots, snails, and carrot root fly.

    3. Attracts:
      Dill - attracts hoverflies and predatory wasps, and its foliage is used as food by swallowtail butterfly caterpillars. Tomato hornworms are also attracted to dill, so if you plant it at a distance, you can draw these destructive insects away from your tomatoes. Dill repels aphids and spider mites. Sprinkle dill leaves on squash plants to repel squash bugs.
      Hyssop - attracts honeybees to the garden.
      Lavender - a favorite among many beneficial insects, but also repels fleas.
      Sunflowers - draw aphids away from other plants. Ants will move their colonies onto sunflowers but sunflowers are unaffected.

    Monday, March 15, 2010

    Quote of the Day!

    I once had a sparrow alight upon my shoulder for a moment, while I was hoeing in a village garden, and I felt that I was more distinguished by that circumstance that I should have been by any epaulet I could have worn. ~Henry David Thoreau

    http://naturalpatriot.org/wp-content/uploads/2007/08/house_sparrow.jpg

    Nature's insect control.

    JohnDeereHomestead.com

    Do bugs bug your roses? Do caterpillars enjoy your cabbage before you do? Do mosquitoes make it impossible to enjoy warm summer nights? Maybe it’s time to enlist Mother Nature’s insect-control army to improve your quality of life. Bring on the birds!
    A single bird can eat 1,000 insects in an afternoon, providing it with critical amounts of fat, protein, and potassium needed to maintain its high metabolism level. Compared to insecticides, birds provide an efficient job of insect control—with no negative impact on the environment. Sign ‘em up!

    To enlist the birds, you need to learn the species of insect eaters that reside in your part of the country and then effectively attract them to your property. “Insect-eating birds help control pests at every stage of life,” says Judy Barrett, an expert on organic gardening from Taylor, Texas. “They eat insect eggs, larvae, and adults. Birds such as barn swallows and purple martins can eat pounds of mosquitoes and other flying insects in a day. Robins, mockingbirds, chickadees, nuthatches, woodpeckers, and titmice are all vociferous insect eaters. Bluebirds’ favorite summer foods include grasshoppers, crickets, ground beetles, spiders, and caterpillars.” Other insect eaters include meadowlarks, red-eyed vireos, yellow warblers, Baltimore orioles, wrens, and eastern phoebes. Even birds you might not think of as insect eaters feed insects to their young to provide the protein they need to grow in their early days of life. By providing the birds’ basic needs—food, water, shelter, and a place to raise their young —you will be treated to an unending source of entertainment and beauty while keeping your insect population under control. Cultivating plants that produce seeds, fruits, and berries will provide food. Allowing flowers such as sunflowers, goldenrod, thistles, cone flowers, and daisies to go to seed will attract finches, juncos, and sparrows and other seed-feeding birds, which feed their young insects. Stocking feeders with seed that is popular with the birds you are trying to attract can enhance your natural feeding efforts. Sunflower seeds, cracked corn, and nyjer thistle are favorites. Birds have preferences of where and what they eat. Some like to feed on the ground, while others prefer to eat at raised feeders. By providing several different types of feeders, each filled with the types of feed birds are attracted to and locating them where those birds prefer to feed, will assure frequent and regular visits.

    Your relationship with birds is one of mutual benefit. You provide for some of the birds’ basic needs, and they help keep down the insect population and treat you to an unending source of entertainment and pleasure. It’s a win-win situation if ever there was one.
    To learn more about attracting insect-eating birds to your backyard, go to the National Wildlife Federation’s Web site, www.nwf.org. You will find information on creating a habitat, established habitats in your area that you can visit, a list of resources to help in establishing a habitat, and much more.

    Sunday, March 14, 2010

    Beautiful color mixes well with garden veggies!

    This photo of summer flowers was taken by Keith Couch at the Boise Capital Farmers Market. Every year growing up I heard Mom and Dad fuss a little bit about planting flowers in the food garden. And every year....Mom won out with marigolds and zinnias and cosmos cheering up the beans and tomato plants. A row of marigolds actually acts as a natural insect barrier.

    Saturday, March 13, 2010

    Beautiful, healthy veggies from your garden to your table!


    Veggies in your garden and on your table is worth the effort and builds strong immune systems. It is the best thing you could plant for your health!


    The vegetable garden has traditionally been located in an area separate from other parts of the landscape because it was considered unsightly. With proper planning, however, the garden can be both functional and attractive.


    There is no act more gratifying, more basic, more liberating, than to coax food from the Earth. Time and the rhythms of nature become the ultimate template by which to live. Do it just to know that you can do it, or do it just to live or do it to save money or for whatever reason.

    Ten steps to begin an organic garden even if you have no gardening experience. The key elements are some sun, soil and water.

    Minimum tools needed. A shovel and rake!

    1. Stop applying all pesticides and weed killers to the soil in and around your entire garden. No exceptions.

    2. Start small, 50 square feet for example. Find the spot that ideally has sun all year in your yard. If it's shaded part of the year, that's OK too. Avoid the area next to buildings or fences because of possible contamination of the soil by paint, heavy metals or chemicals.

    3. Remove whatever debris is covering the dirt including rocks larger than a fingernail. If plants already grow there that you want somewhere else, dig them out with the shovel and save them off to the side.

    4. Cover your gardening area with organic material such as leaves, dried grass and fine plant material from your own or other's non-pesticide sprayed gardens.

    5. Get a bucketful of good compost from someone else's garden or crumbly black sweet-smelling soil from under forest trees. Spread this thinly all over your garden. You will be inoculating your soil with all manner of soil organisms, little bugs, worms and other beneficial life forms that are going to do most of the work for you if you give them the chance.

    6. Use the pick or shovel to mix the top 3 inches of soil and organic material. Burying the organic material any deeper just kills the critters and wastes your energy.

    7. Keep the soil damp like a wrung out sponge, not soggy.

    8. Never walk on your soil. Make a kneeling board out of a small piece of scrap plywood to avoid compacting the soil and use an old cushion to save your knees. Create the minimum width paths to be able to reach across the soil without too much leaning.

    9. Obtain vegetables in 4" square pots, a common size, or plants from friends. pots. Dig a hole slightly larger than the rootball, squeeze the sides of the pot to unstick the plant, fluff it's roots sideways and plant it. Mulch around it with organic material to keep the soil moist underneath it. Water the root ball.

    10. Start your own compost heap in a corner of the garden. Skip the gimmicks, tumblers, boxes and devices. Just heap up all the clean organic material that you can get and mix it up occasionally. Apply the compost periodically to the soil around your plants or use it to start your own seeds.

    Friday, March 12, 2010

    Gardening in Containers!


    http://www.simplegiftsfarm.com/images/containergardeningbulbs.jpg


    http://www.growquest.com/container%20gardening/32-635.jpg

    Gardening in pots and containers offers many advantages. A container lets you experiment with plant combinations and color. You can easily swap out plants with the season. Many container gardens are portable. You can let them follow the sun, or use them to fill in gaps in a border. And container gardens fit just about anywhere. So there's no excuse not to have a garden, even if you are a city apartment dweller.

    Wednesday, March 10, 2010

    Edibles in your landscape!

    http://www.marlerblog.com/uploads/image/Parsley.jpg

    Herbs are an essential part of any great cooks kitchen and curly parsley and many other herbs are beautiful tucked in beside bright annual flowers.

    Strawberries are great ground cover and beautiful on a slope or between stepping stones. Raspberries are a great cover up for unsightly fences.

    Blueberries are a great shrub to add to your landscape plan.

    Filbert and English walnuts will be a wonderful tree and yeild nuts for baking.


    Here are some more ideas for edible landscapes:

    • Put pots of herbs on the patio
    • Include cherry tomatoes in a window box or hanging basket
    • Build a grape arbor
    • Grow nasturtium, violas, borage, or calendula and include flowers in salads
    • Eat your daylilies
    • Plant a fruit tree in the corner of your yard
    • Grow Red-jewel Cabbage
    • Plant colorful pepper varieties (e.g., Lipstick, Habanero) alongside flowers
    • Tuck lettuce, radishes, or other short-lived greens into a flower bed
    • Replace a barberry hedge with gooseberries
    • Put basil together with coleus in a planter
    • Try yellow or "rainbow" chard
    • Grow chives around the mailbox
    http://www.seedfest.co.uk/seeds/herbs/chives.jpg